Construction Notes Manager
for AutoCAD
CNM "Construction Notes Manager" Tutorial - Section Seven
Introduction:
Section One: INSTALLING CNM & SETUP
Section Two: TUTORIAL SETUP
Section Three: EDITING PROJECT NOTES
Section Four: INSERTING "BUBBLE NOTES"
Section Five: EDITING BUBBLE NOTES
Section Six: RUNNING "NOTES MANAGER
Section Seven: PHASED CONSTRUCTION NOTES
Section Eight: QUANTITY TAKE-OFF
Section Nine: CNM Editor Configuration
Section Ten: Customizing CNM
Section Eleven: Video Files
7.0 - PHASED "CONSTRUCTION NOTES"
The program allows "phasing" to be accomplished for a project. In order to phase a project let's first look at the actual inserted bubble block in the drawing. The block as shown in the following figure shows a typical circle bubble block that is being edited with the "attedit" command. As was described in section 5, you can type "ee" for attedit.
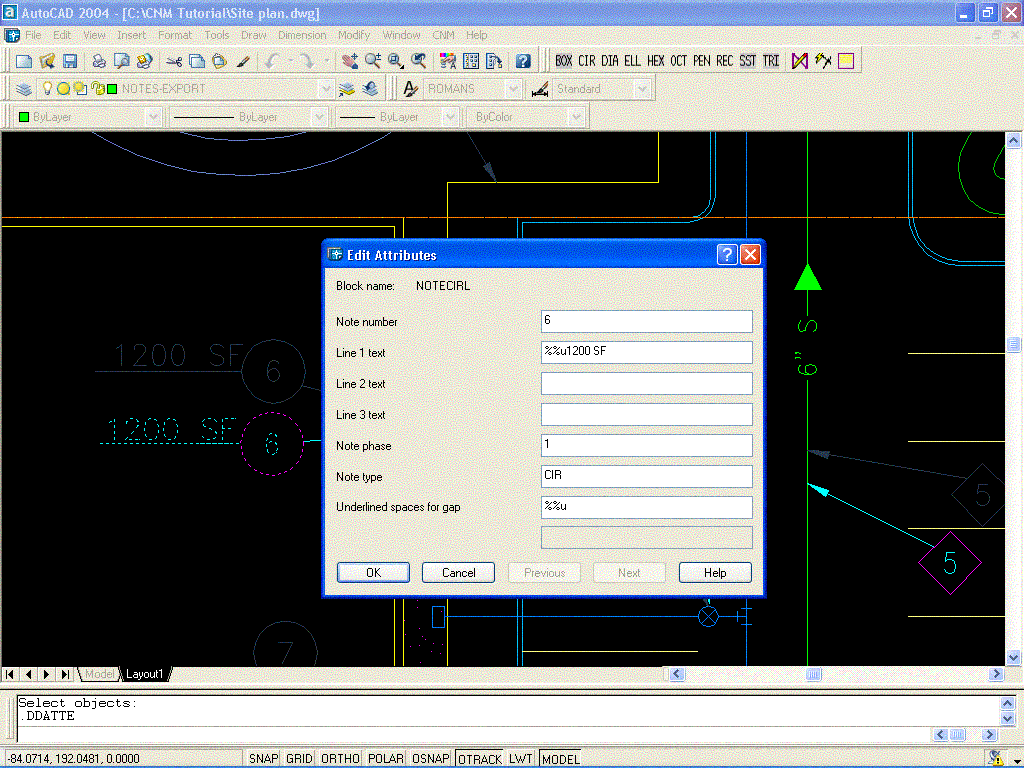
Note the different attributes in the block. The first is the actual note number. The next three lines, "Line1 text", "Line2 text", and "Line3 text", are lines that can be visible with the associated block, and provide data for quantification depending on the constnot.txt file as was previously discussed in Section 5. The next line is for phasing. By default the program places a 1 here. Generally, for projects that don't require any phasing there will be no need to change this number. However, if you want the plan to reflect quantities of a Phase 1" and a Phase 2", Phase 3", (up to 8 phases), then you must change the attribute to correspond with the phase that it is to be associated with.
In the Site plan.dwg, go to the left side of the building and type "ee" for editing the bubble block and pick circle bubble note number 5. Change the Note phase attribute to a 2. If you wish, change a few of the other notes as well. However, do not change all of them so that you can see how the construction notes table is inserted when there are two different phases.
Video Clip to be updated
Now, go to the notes pull down menu and click on "Edit Project Notes" or click on the Edit Project Notes Icon in the Toolbar. Once the notes editor is open, click on the Config Tab and look at the option for the Number of project phases as shown in the following picture:
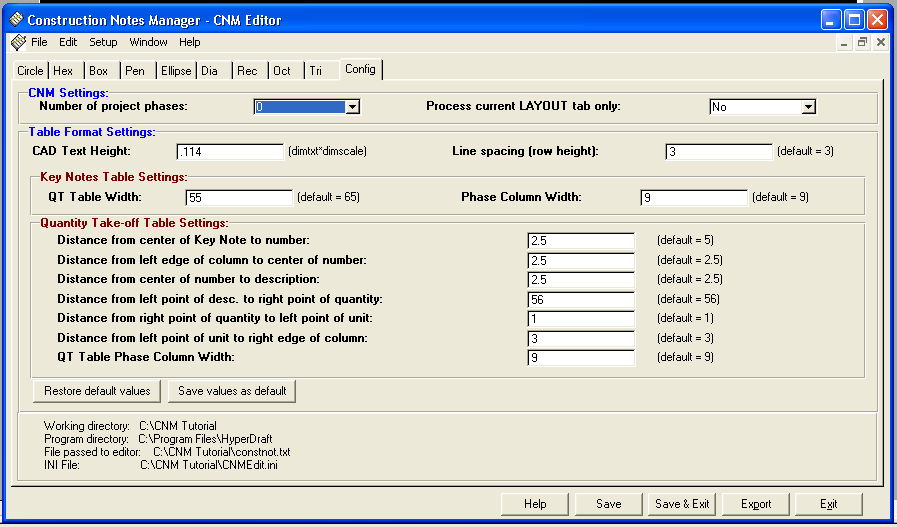
Change the Number of Project Phases option to 2. Save and exit the Construction Notes Editor
Now, click on the Key Notes Table command and re-run the notes. You will see the quantities change that correspond to each bubble block's phase. From then on, all bubble blocks that have a 1 in the attribute for the Phase Number will be counted with the Phase 1 quantity. All of the bubble blocks that have a 2 in the attribute will be associated with Phase 2.
Video Clip needs to be updated with new CNM editor