Construction Notes Manager
for AutoCAD
CNM "Construction Notes Manager" Tutorial - Section Three
Introduction:
Section One: INSTALLING CNM
∓SETUP
Section Two: TUTORIALSETUP
Section Three: EDITING PROJECT NOTES
Section Four: INSERTING "BUBBLE NOTES"
Section Five: EDITING BUBBLE NOTES
Section Six: RUNNING "NOTES MANAGER
Section Seven: PHASED CONSTRUCTION NOTES
Section Eight: QUANTITY TAKE-OFF
SectionNine: CNM Editor Configuration
Section Ten: Customizing CNM
SectionEleven: Video Files
3.0 - EDITING PROJECTNOTES
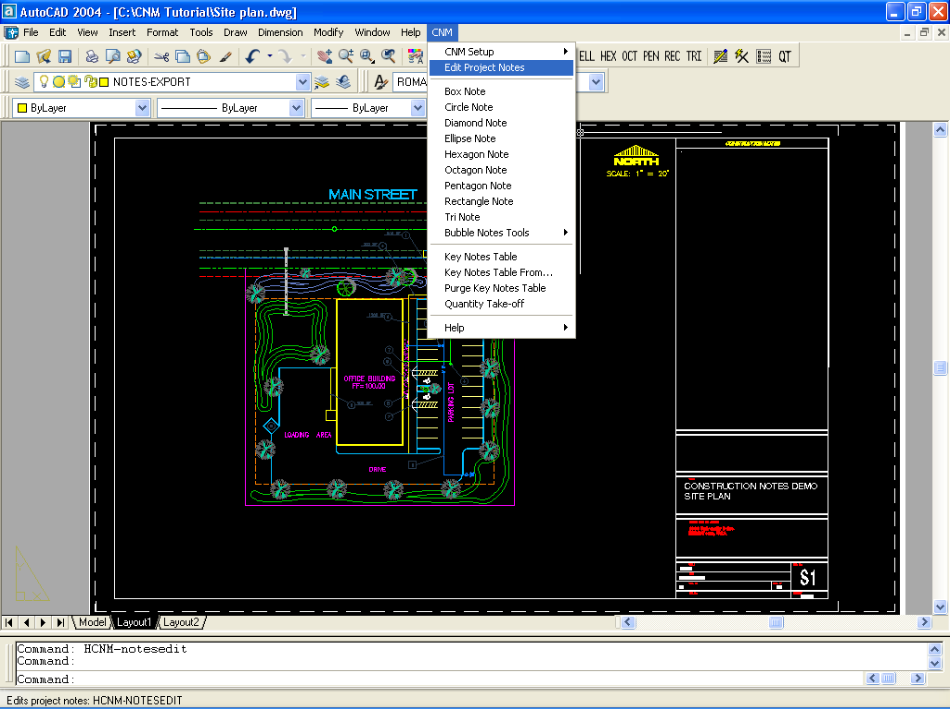
Under the pull down menu "CNM" click on "Edit Project Notes" or pick the icon on the toolbar.
Edit Notes Icon
The program creates and uses a file called "Constnot.txt" which is the Project Notes file foradrawing or set of drawings that useskey notes. This file is simply a text file, but is formatted in such a way as to be used in the CNM editor. A sample Project Notes file is shown below.

Once you click on the Edit Project Notes button, if there is not an existing Project Notes file in your project folder, the program will bring in a sample.
In this example, the Project Notes file is set to the"CNM Tutorial" folder.

Note:
Another way to bring this file into your project directory is simply to copy and paste using windows
explorer. If you've created a template to use on subsequent projects, then make a backup of the default Project Notes file (such as consnot.bk1) and copy your template over the default
Project Notes file. Alternately, just make a library of the Project Notes files and copy and paste them into your working project directory as needed.
Once you select where you wish the Project Notes file to reside, the program will open the editor. The following picture shows what the editor looks like, without any notes
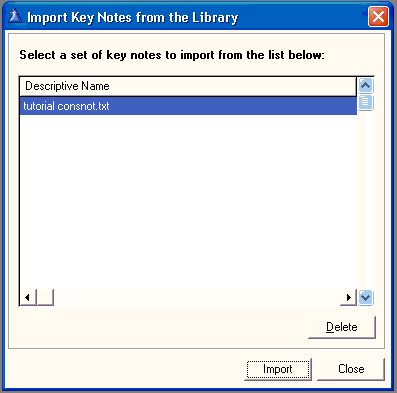
Since there are no active note files, select "Import Notes from Library" from the File pulldown menu as shown below

The "Export Notes to Library" allows you to save a notes file to the library as the name implies
"Change Library Path" allows you to change to another path for importing the notes file. This could be real helpful in setting up CAD standards
Select the Project Notes file you wish to use for your particular project. For this tutorial select the one as shown below. Once highlighted click on the import button.
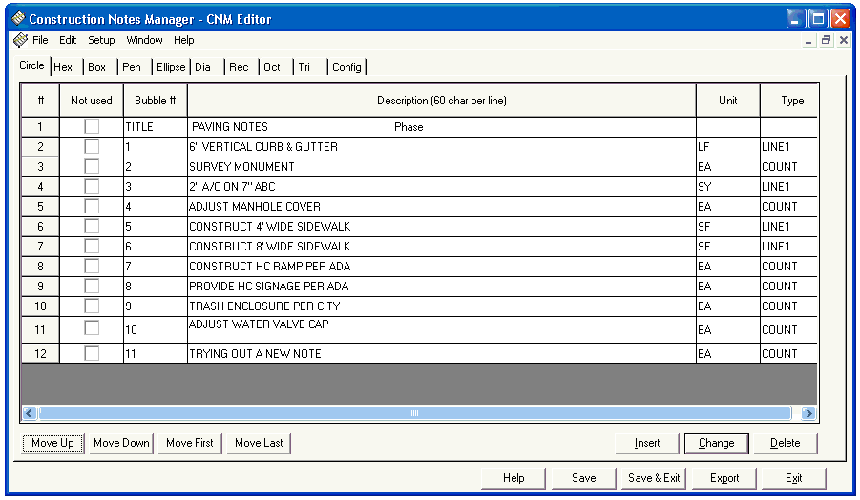
The imported file will add in the notes as shown below. Notice the tabs at the top. There is a tab for
circle notes, hexagon notes, box notes, pentagon notes, etc. Also note how the information to be used is divided into columns.
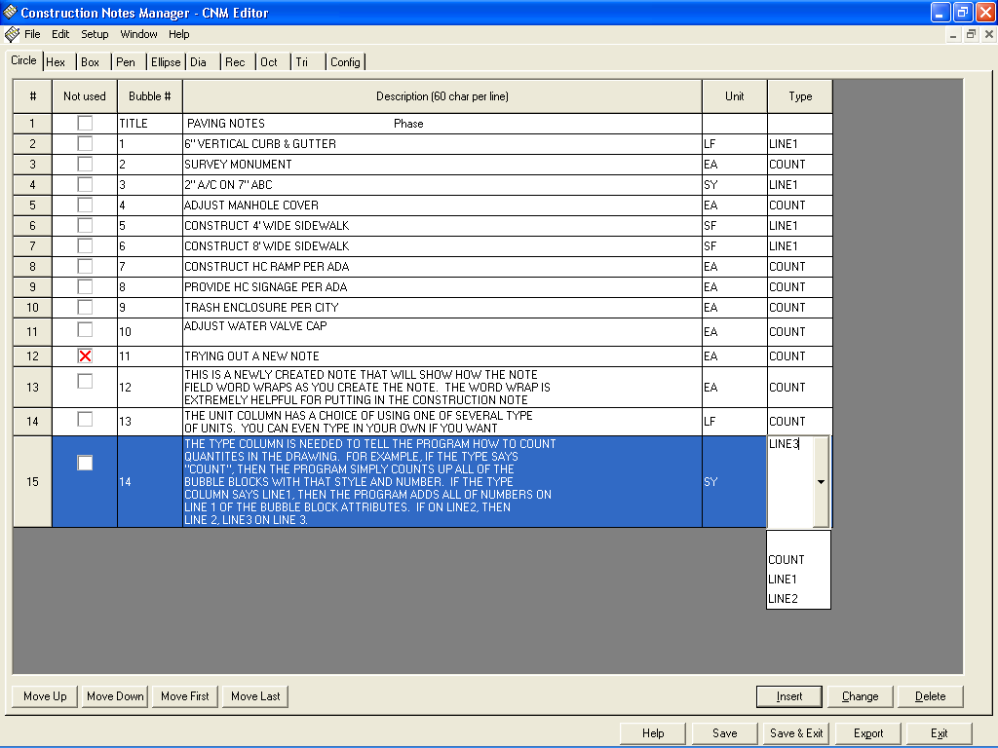
The "Not Used" column is simply a way for the CAD operator to know quickly whether or not a note is to be used.
Also, the program will ignorethisconstruction note.
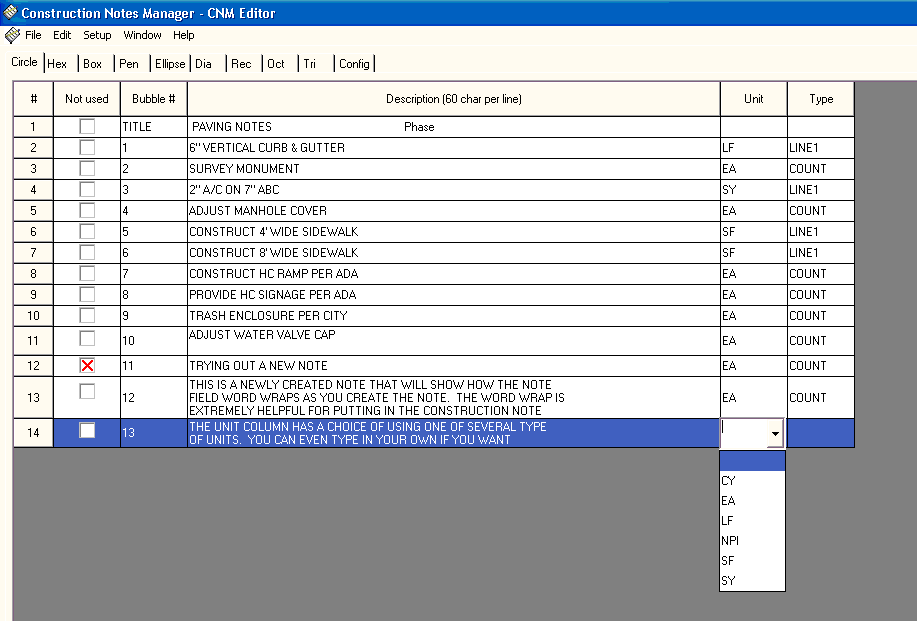
The "Bubble #" column corresponds with the bubble note number as used in the drawing. The "Description" column is
the actual construction note verbage as desired for the drawing. The "Unit" column indicates what type of unit is to be used for the note. The "Type" column tells the program what
option to use when counting quantities.
The only fields that are required are the "Bubble #" , the "Description" and the "Type". The other information can
be optional as needed for your drawing.
In order to create new notes in the file,
simply click on the "Insert" button and type in each field as needed. The note will be inserted below any "highlighted" row. In order to add a note to the bottom, simply click on the last
note so that it is highlighted before hitting "Insert".
As shown below in the next two figures, afewnotes have been inserted showing off a few of the options of each of the columns.
Noticehow the note can word wrap in the description field. Also, for the Unit and Type you can select one of
the predefined selections or type it in for a more customplan.